.png)
Manage Dependencies with Maven
As we know that Selenium WebDriver is a Java library, so we need to add Selenium WebDriver dependency in our project. We can add Selenium WebDriver dependency in our project in two ways:
- Using Maven
- Using Eclipse IDE
Let's see how to add Selenium WebDriver dependency in our project using Maven.
Create a new Maven project in Eclipse IDE.
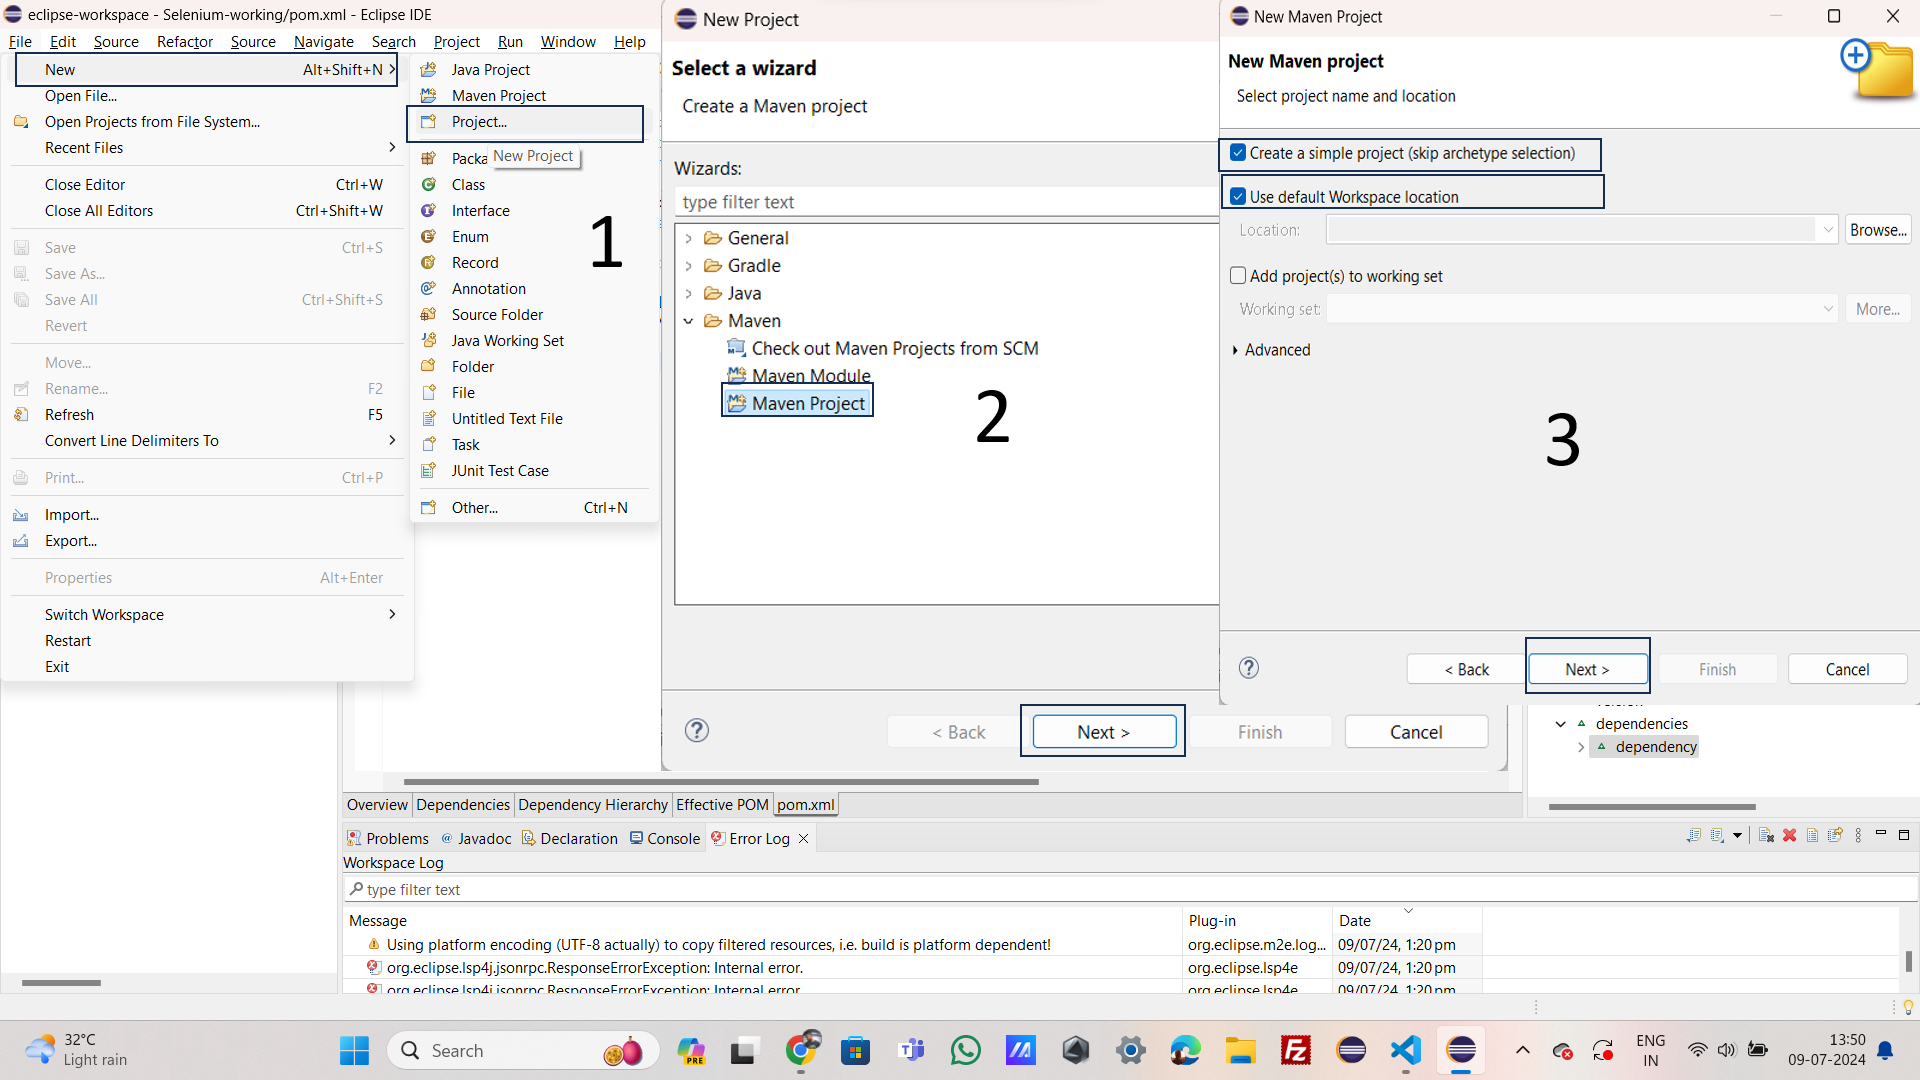
Step 1: Open the New Project Wizard
- Navigate to the Menu:
- Click on File in the top menu.
- Select New > Project....
Step 2: Select Maven Project
- Choose Maven Project:
- In the "Select a wizard" dialog, type Maven in the filter text box to narrow down the options.
- Select Maven Project from the list under the Maven category.
- Click Next.
Step 3: Configure the New Maven Project
- Configure Project Settings:
- Ensure the options Create a simple project (skip archetype selection) and Use default Workspace location are checked
- Click Next to proceed.
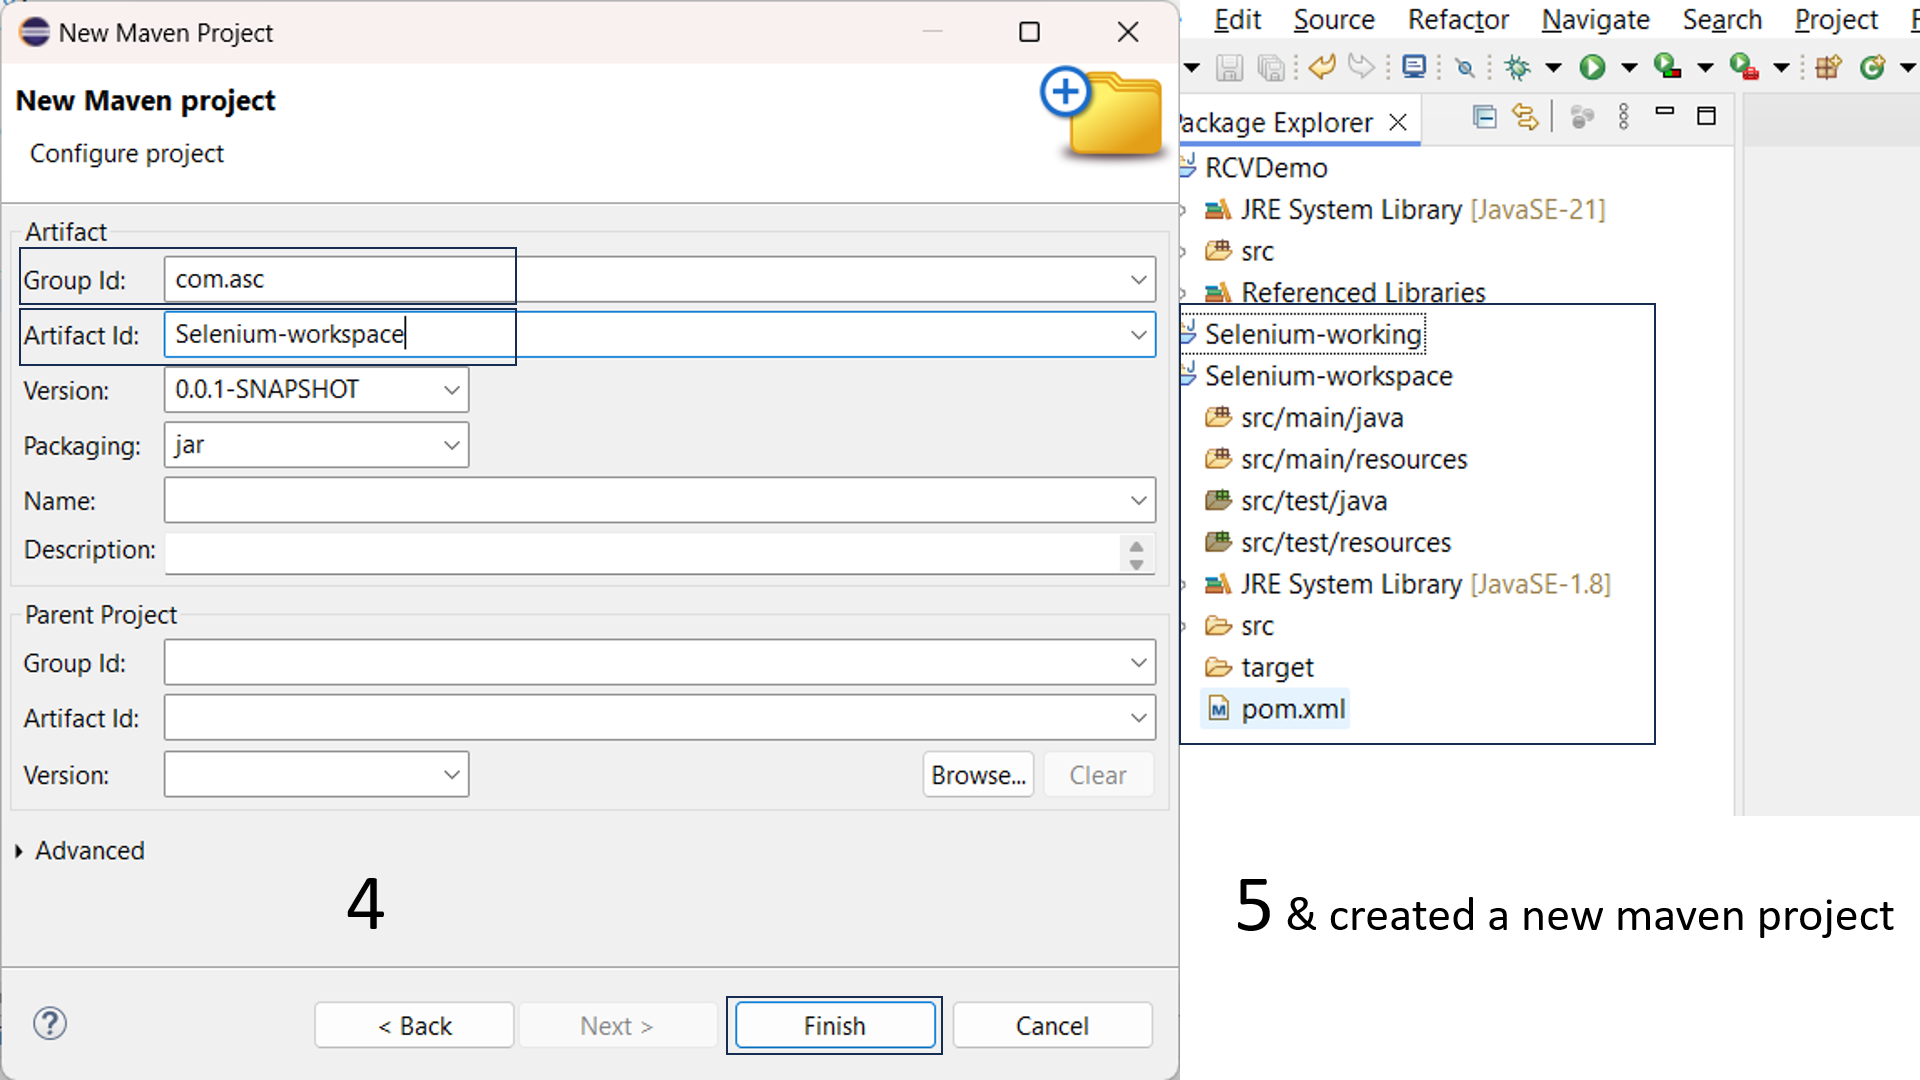
Step 4: Enter Project Coordinates
- Enter Project Coordinates
- Group Id: Enter the group identifier (e.g., com.asc).
- Artifact Id: Enter the artifact identifier (e.g., Selenium-workspace).
- Version: The default version is 0.0.1-SNAPSHOT. You can change it if needed.
- Packaging: The default packaging type is jar. Change it if necessary.
- Name and Description: Optionally, you can fill in the Name and Description fields for your project.
- Click Finish to create the project.
Step 5: Verify and Edit the 'pom.xml'
- Verify Project Structure:
- Once the project is created, verify the structure in the Package Explorer or Project Explorer.
- Open the pom.xml file and review it to ensure it has the correct configurations and dependencies.
Final Steps:
Click this button to add the necessary (Version) dependencies in your Project.
Click on the version the get the dependency
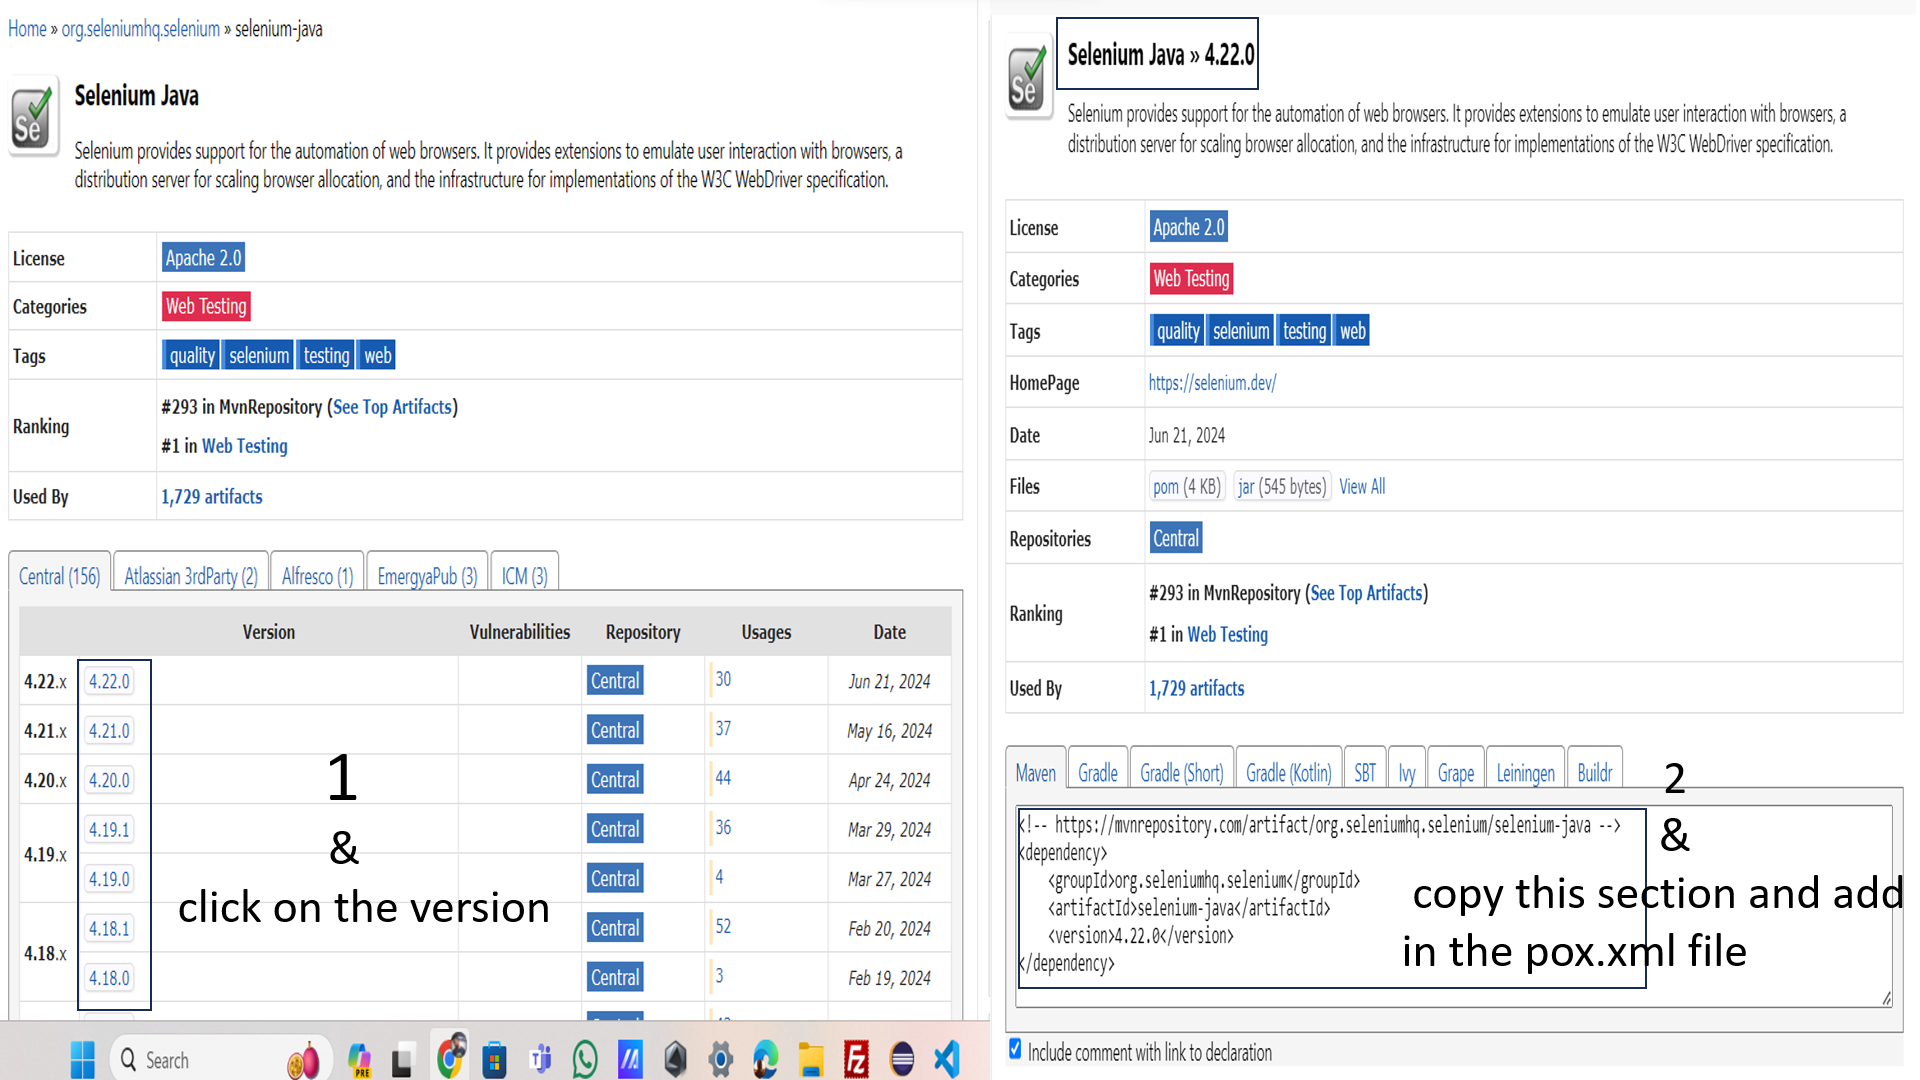
- Add Dependencies:
- Add any necessary dependencies inside the 'dependencies' section of the pom.xml file.
